Wednesday, May 9, 2018

90s Living Room Transformation- Reveal


The One Room Challenge reveal of our living room is finally here! My husband and I had so much fun bringing our living room into this century! Everything in this room got a makeover: the built-ins, the fireplace, the floors, and the furniture all got a much needed facelift. My husband and I did all of the work ourselves (with the exception of staining the floors), so it's always rewarding to finish a room and see all of our hard work pay off! See below for how we transformed our space.


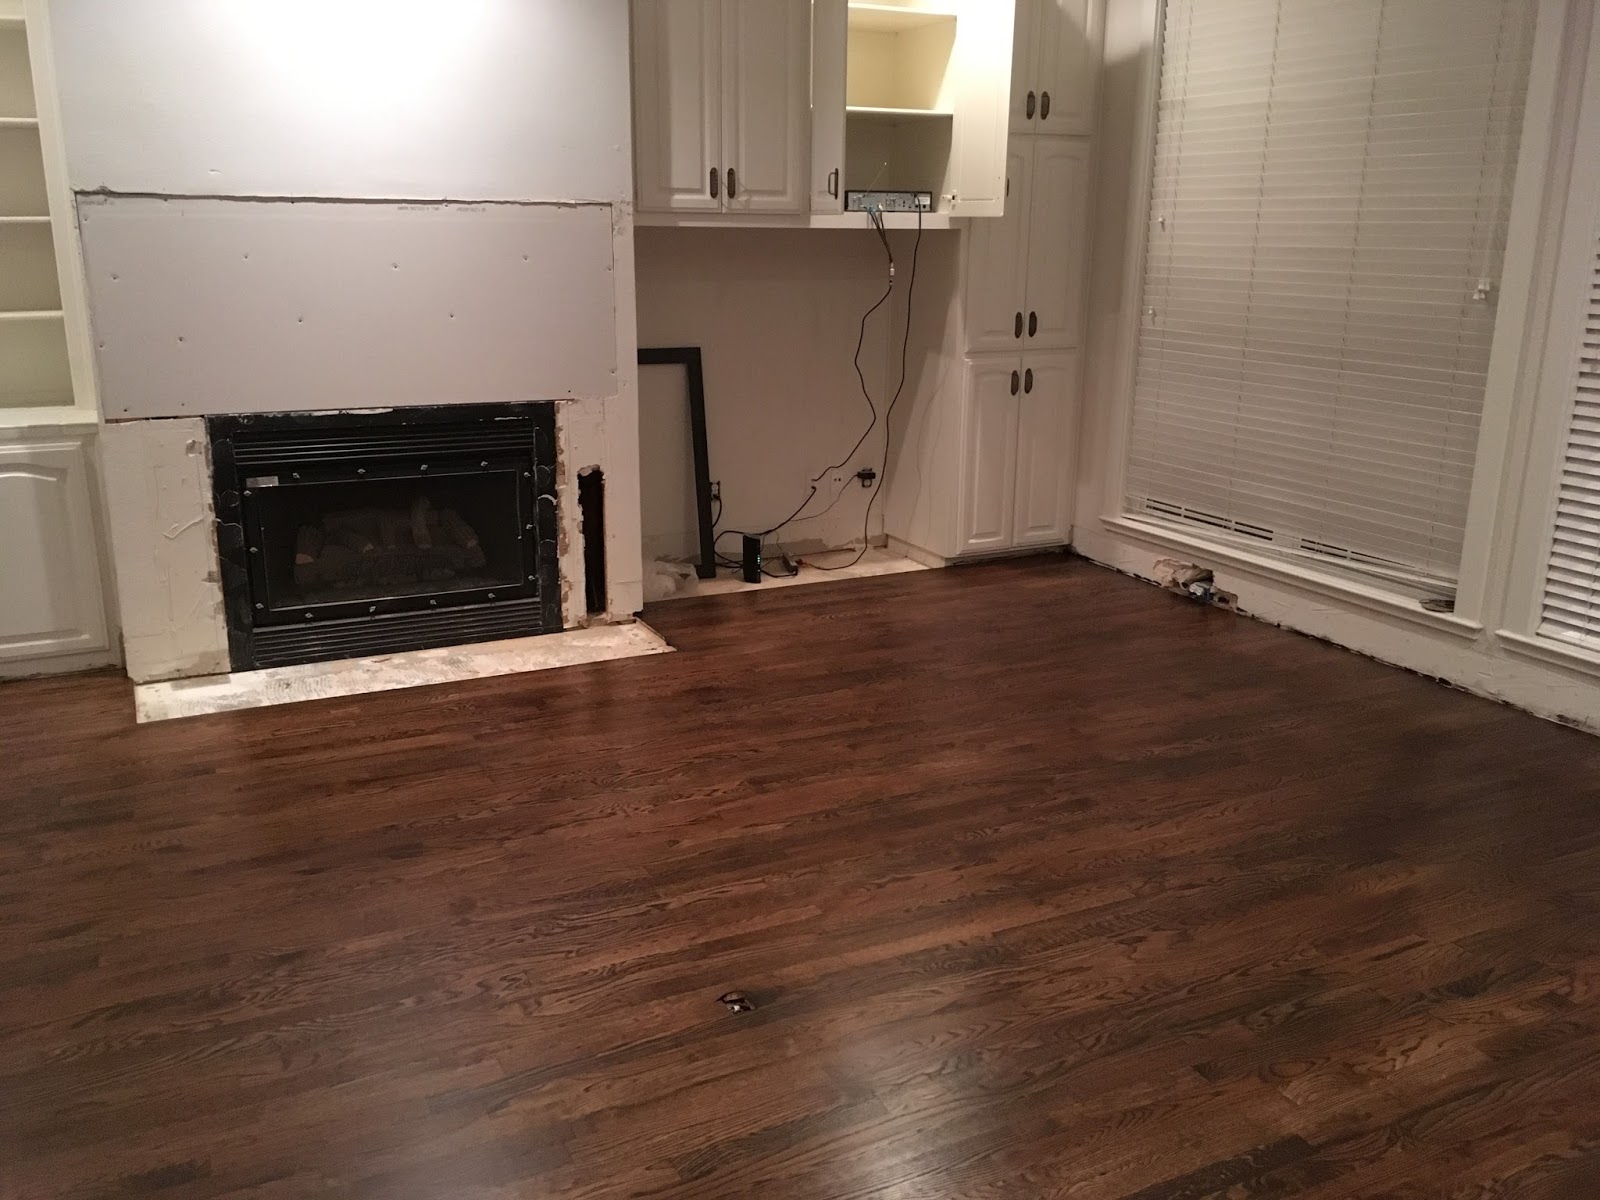
First, here is an overall view of the renovation. Here is what our living room looked like before. You can see the old shag carpet in this picture. We ripped it up and put down hardwood floors. It was my first time laying wood floors, so that was an adventure!


Here is what it looks like after:


From another angle: Before:


After: This is a good angle that shows the gorgeous sectional that I found on Craigslist for 75% off.


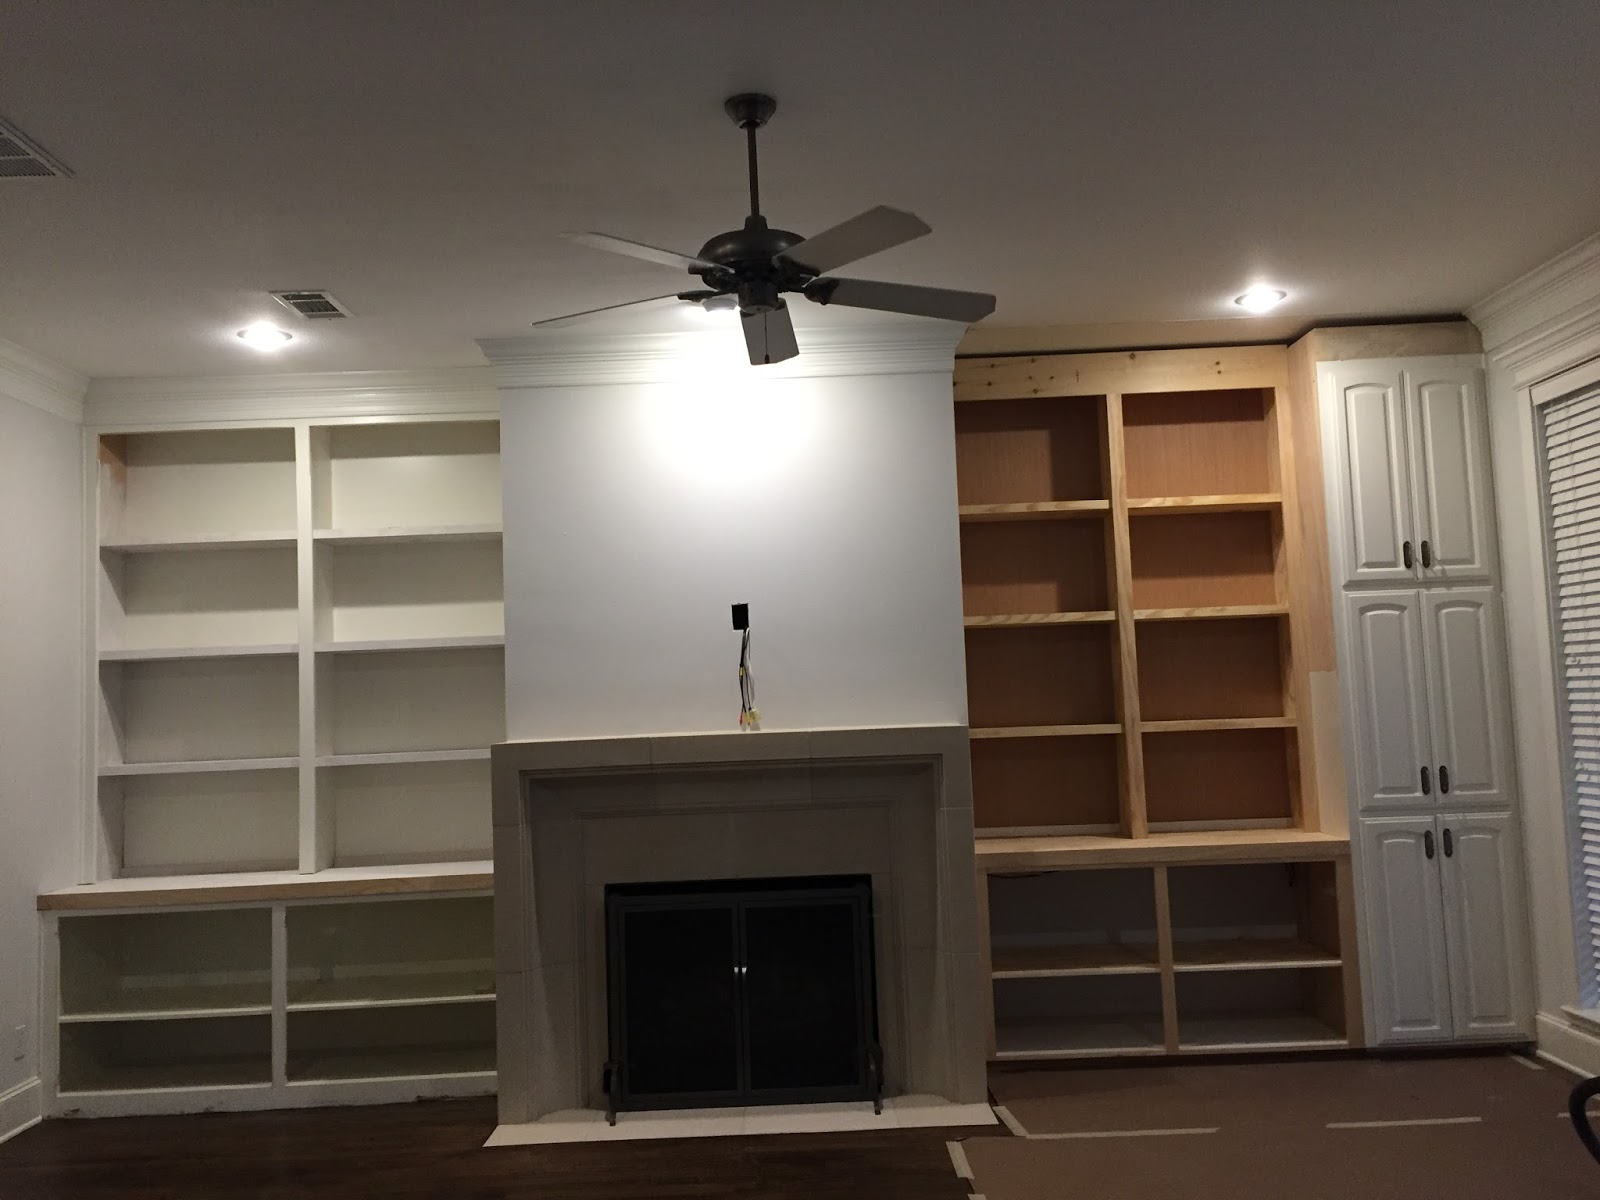
One of the biggest transformations was to the bookshelves. They lacked symmetry and the flimsy shelves drove me crazy. My husband, Joseph, rebuilt the shelves on the left side with thicker shelves and got rid of the arched detail.


Before:


After:


On the right side, we took out the cabinets and built bookshelves and storage underneath. We kept the floor to ceiling shelves on the far right.


Before:


After:


We added cabinets with metal screens, so that we could put our DVD player and cable box behind them. The screens blended in nicely with the gray cabinet color. 


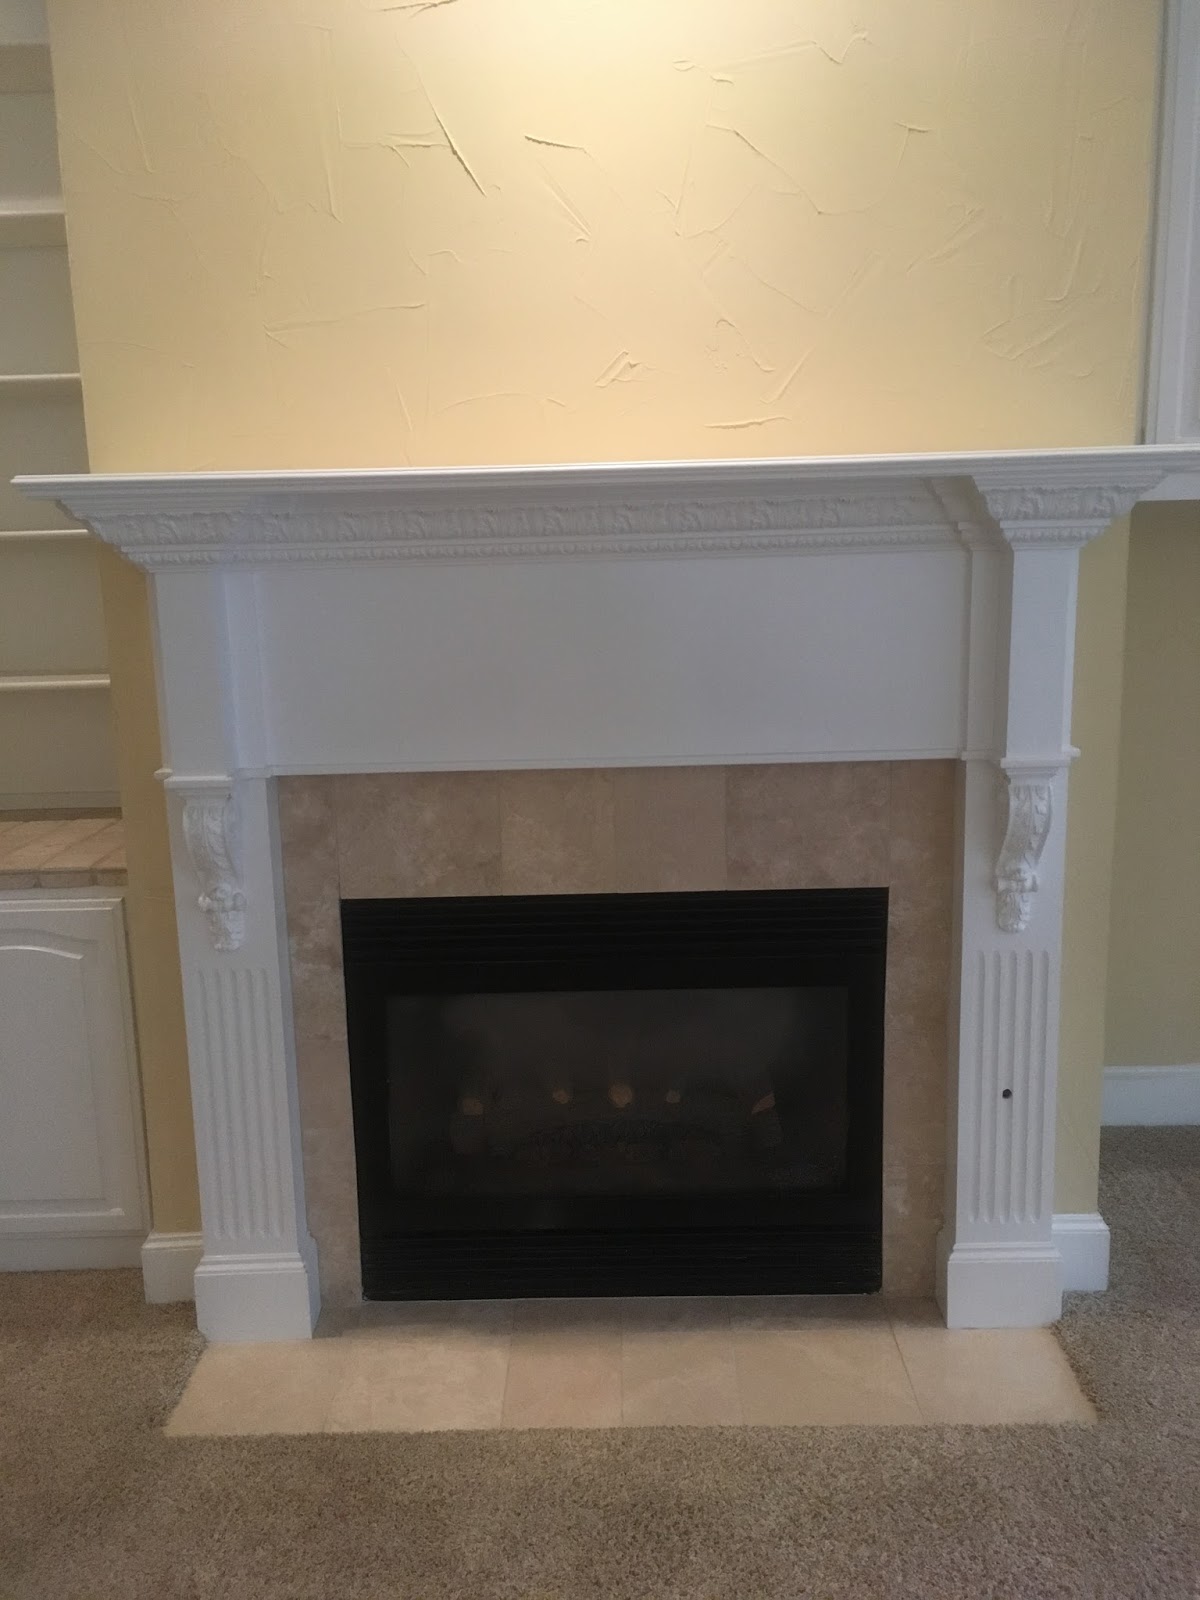
We replaced the old mantel with a beautiful cast stone mantel that I found on a Facebook resale group for about a quarter of full price. This was one of my favorite deals that I scored in our living room!
Fireplace Before:


Fireplace After:


There was a blank wall on the far left wall of the room, so I added some black and white photos and this gorgeous console from Wisteria to give the wall a bit more visual interest.  

We also had our shutters redone. I love the floor to ceiling windows and all of the natural light that they let in. 


Here are a couple more angles of the living room. We are so happy with how it turned out! 


Some of my favorite details from around the room: 


Thank you for following our One Room Challenge journey! Follow me on Instagram @libsykora for more room transformations throughout our house! 


Wednesday, May 2, 2018

90's Living Room Transformation-ORC Week 5

90's Living Room Transformation

https://www.oneroomchallenge.com/

Week 5


For week 5 of the One Room Challenge, I will share with you some of the furniture finds that we purchased for our living room. I knew that I wanted to get new furniture for our new living room, but was on a moderate budget. I scoured the internet (mostly Craigslist and Facebook), shopped outlet stores, and waited for sales to find good deals.


The first piece of furniture that we bought for our living room was this gorgeous custom-made linen sectional. I found it on Craigslist and we got it at about 75% off. It was practically new and such a steal of a deal!


I got this rustic console table from the Wisteria Outlet for 40% off list price! I love the clean lines and the rustic style really warms up the space. Since each piece is made by hand with reclaimed wood, each console is one of a kind!


The one item that I splurged on in our living room was the Martens Rectangular Coffee Table in Aged Elm from Restoration Hardware. I have had my eye on this coffee table for years, so my husband and I decided to finally pull the trigger and get it.


We decided to use a rug that we already had in our old house. It's the Surya Frontier Ft-613 Area Rug


We also had our shutters put in this week. I love how they turned out!


Next week is the final week of the One Room Challenge! I can't wait to reveal our finished living room. Follow along here or on Instagram @libsykora


Wednesday, April 25, 2018

90's Living Room Transformation-ORC Week 4

90's Living Room Transformation


https://www.oneroomchallenge.com/


Week 4


In week 4 of our One Week Challenge, we rebuilt the built-ins in our living room.
When we bought our house, the built-ins were at the top of my list for things that I wanted to change. The shelves on the right side of the living room were really thin and flimsy and I wasn't crazy about the arches at the top. The cabinets on the left side were built to house one of those jumbo TVs that everyone had in the 90's, so that alone dated the room. I am all about symmetry, so the lack of symmetry between the left and right side of the built-ins drove me crazy!


Here is what our living room built-ins looked like when we moved in:


There were definitely things I loved about the built-ins (like all of the extra storage), but they just needed a major facelift. Lucky for me, I have a very handy husband. I somehow convinced him to tear out the cabinets and rebuild the built ins.


On the right side, my husband rebuilt the shelves with thicker shelves and we tore out the tile counters and replaced them with wood counters. I painted the cabinets Sherwin Williams Repose Gray to match our walls. I wanted them to blend with our walls.


Here is a before picture of the left side:


And here is the after picture. We ordered cabinet doors, but they haven't gotten in yet, so I guess this is more of a "during" picture.


On the right side of the built-ins, we kept the floor to ceiling cabinets that were on the far right. We ripped out the cabinets that were above the alcove for the TV.
We built a bookshelf and cabinets to match the left side. The right bookshelf is about a foot narrower than the left, but I think they look pretty symmetrical. We also had to fix the crown molding, because the bookshelf was about a foot shallower than the cabinets that were there before.


Here is the before picture of the right side:


Here is a "during" picture before I painted everything:


Here is the after picture. Again, this is more of a "during" picture, because we still need to install the cabinet doors and you can see that I still have a little bit more painting to do.


Here is the after picture of the whole wall. The built-ins are going to look so good with the fireplace once they are finished! I can not wait to start decorating (as you can tell, since I already put a bowl on one of the shelves that had dried)!


Next week we will finish the built-ins and I will show you some of the furniture that I have found for our living room over the past few weeks! Follow along here or follow me on Instagram @libsykora

Friday, April 20, 2018

90's Living Room Transformation-ORC Week 3

90's Living Room Transformation


https://www.oneroomchallenge.com/


Week 3


The mantel that was in our living room was a little too ornate for my taste. I also thought it dated the space a little. I knew I wanted a cast stone mantel, but they were way out of my budget.


Luckily, someone on Facebook was selling a custom made cast stone mantel that didn't work in their space for a fraction of the cost! I jumped on the opportunity and bought the mantel. The mantel was a little too large for our space, so we had to have the mantel company cut it down to fit our space. This week was pretty easy, since we had someone from the mantel company come and install the mantel for us. See before and after pictures below!


Here is the old mantel. You can also see that there was a lot of texture on the walls that we had to smooth out.


We ripped out the mantel and patched the drywall. We were able to keep the mantel in tact, so we sold it for $50 so someone else could enjoy the mantel.


Then we let the mantel crew take over on the instillation. Here is a progress shot after the new mantel was installed:


I didn't really love the fake logs that were in the fireplace, so I wanted to either replace them or find a screen to cover them up. I found a Restoration Hardware fireplace screen on Craigslist for $150, so I figured that would do the trick! Here is a picture of the finished product. I am in love with our new mantel and I am so glad that we were able to find something so beautiful within our budget!


That wraps up week 3 of the One Room Challenge. Follow along next week as we install new built-ins in our living room! You can follow along here or follow me on Instagram @libsykora


Thursday, April 12, 2018

90's Living Room Transformation-ORC Week 2

90's Living Room Transformation

https://www.oneroomchallenge.com/

Week 2


Week 2 of my One Room Challenge was all about the floors!

First things first: ripping up that nasty shag carpet. The rest of the downstairs has 2 1/4" wide white oak hardwood floors, so we chose a wood that would match. 

I learned how to lay hardwoods this week. My husband was super patient and a really good teacher. Here is a progress shot of the floors.


The carpet met the hardwood floors from the kitchen at a weird angle, so we had to cut some of the existing hardwoods and feather in the new hardwoods. This was a little more involved work, so my husband handled this part. Once the floors are sanded and stained, you won't be able to tell the difference between the old hardwoods and the new hardwoods.


Now to pick out a stain. I knew that I wanted a medium tone floor. I love the color of the floors in the picture below. The color is really warm and the floors aren't too light or too dark.


Design by Sarah Sherman Samuel


We mixed a couple of test colors to decide which stain to go with. I decided to go with the middle color, which is 3 parts Duraseal Antique Brown and one part Duraseal Ebony.


We let the professionals take over from here. They came in and sanded and stained our floors. We had to be out of the house for the better part of the week.

Here is the finished product!


As you can see in the last picture, we have already ripped out the old mantel. Next week we will be focusing on replacing the mantel with a GORGEOUS cast stone mantel that I found in a Facebook resale group!

Follow along here or on Instagram @libsykora to watch our living room take shape!


Thursday, April 5, 2018

90's Living Room Transformation- ORC Week 1

90's Living Room Transformation

https://www.oneroomchallenge.com/
 

 Week 1


Our house was built in the 90's, so all of the rooms could use a little bit of a refresher, but no room needs it more than our living room!

The built-ins in the living room are built for one of those jumbo flat screens that everyone used to have in the 90s and the shelves are flimsy on the other side. I am all about symmetry, so the built-ins immediately drove me crazy when we were looking at our house!


The other thing that immediately caught my eye (in a bad way) was the carpet. Not only is the carpet like a shag carpet, but it also runs into hardwoods that are in the kitchen, so it makes the living room feel much smaller.


I am also not a fan of the fireplace, the paint color, or the cheap blinds on the beautiful floor to ceiling windows, so pretty much the whole room is a gut job.


Now onto my plans for the room:

My  husband is super handy, so I am hoping  to talk him into rebuilding the built-ins to make them look more symmetrical. I love gray bookshelves like the one below!


Design by Sims Hilditch

We will also rip up the carpet and put down hardwoods to make the space feel larger. I will paint the walls a neutral, either gray or white.

I want to get a new cast stone mantel with a modern vibe and I want to get nice new shutters to replace the cheap blinds.
I love the built-ins and the fireplace in this gorgeous neutral living room by Munger Interiors.


Design by Munger Interiors

A large sectional will tie the space together nicely and make it the perfect place for cozying up and watching t.v.

Follow along over the next five weeks as my husband and I transform this space and give it a much-needed facelift while completing the One Room Challenge


90s Living Room Transformation- Reveal

  The One Room Challenge  reveal of our living room is finally here! My husband and I had so much fun bringing our living room into th...